Difference between revisions of "Glyphs"
Jump to navigation
Jump to search
Garou • Auspice • Breed • Directions • Elements • Leaders • Nature • Pack • Ranks • Renown • Seasons • Spirits • Triat • Tribe • Weather • Misc
| Line 118: | Line 118: | ||
==Spirits== | ==Spirits== | ||
<gallery perrow="5"> | <gallery perrow="5"> | ||
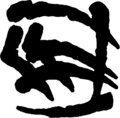
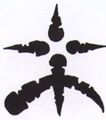
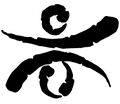
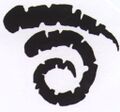
| − | Image:| | + | Image:GaiaGlyph.jpg|Gaia |
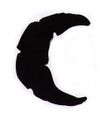
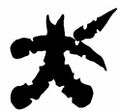
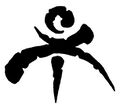
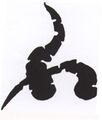
| − | Image:| | + | Image:LunaGlyph.jpg|Luna |
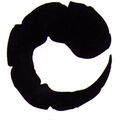
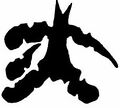
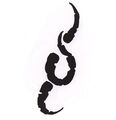
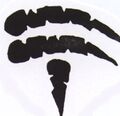
| − | Image:| | + | Image:HeliosGlyph.jpg|Helios |
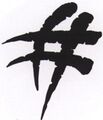
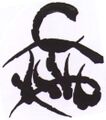
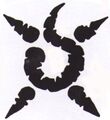
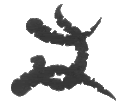
| + | Image:TotemGlyph.jpg|Totem | ||
</gallery> | </gallery> | ||
| Line 137: | Line 138: | ||
Image:MonstersGlyph.jpg|Monsters | Image:MonstersGlyph.jpg|Monsters | ||
Image:VampiresGlyph.jpg|Vampires | Image:VampiresGlyph.jpg|Vampires | ||
| + | </gallery> | ||
| + | |||
| + | |||
| + | ==Umbra== | ||
| + | <gallery perrow="5"> | ||
| + | Image:UmbraGlyph.jpg|Umbra | ||
| + | Image:ErebusGlyph.jpg|Erebus | ||
| + | Image:PangeaGlyph.jpg|Pangea | ||
</gallery> | </gallery> | ||
| Line 162: | Line 171: | ||
Image:CroatanTribeGlyph.png|Croatan | Image:CroatanTribeGlyph.png|Croatan | ||
Image:WhiteHowlersTribeGlyph.jpg|White Howlers | Image:WhiteHowlersTribeGlyph.jpg|White Howlers | ||
| + | Image:RoninGlyph.png|Ronin | ||
</gallery> | </gallery> | ||
| Line 186: | Line 196: | ||
Image:DangerGlyph.jpg|Danger | Image:DangerGlyph.jpg|Danger | ||
Image:DeathGlyph.jpg|Death | Image:DeathGlyph.jpg|Death | ||
| − | |||
Image:First TimesGlyph.jpg|First Times | Image:First TimesGlyph.jpg|First Times | ||
Image:GaiaGlyph.jpg|Gaia | Image:GaiaGlyph.jpg|Gaia | ||
Image:GnosisGlyph.jpg|Gnosis | Image:GnosisGlyph.jpg|Gnosis | ||
Image:GuardianGlyph.gif|Guardian | Image:GuardianGlyph.gif|Guardian | ||
| − | |||
Image:HelpingGlyph.jpg|Helping | Image:HelpingGlyph.jpg|Helping | ||
Image:HiddenGlyph.jpg|Hidden | Image:HiddenGlyph.jpg|Hidden | ||
| Line 199: | Line 207: | ||
Image:LifeGlyph.jpg|Life | Image:LifeGlyph.jpg|Life | ||
Image:LoveGlyph.jpg|Love | Image:LoveGlyph.jpg|Love | ||
| − | |||
Image:MemorialGlyph.jpg|Memorial | Image:MemorialGlyph.jpg|Memorial | ||
Image:ObservantWatch.gif|Observant Watch | Image:ObservantWatch.gif|Observant Watch | ||
| − | |||
Image:Past Present FutureGlyph.jpg|Past Present Future | Image:Past Present FutureGlyph.jpg|Past Present Future | ||
Image:QuestGlyph.jpg|Quest | Image:QuestGlyph.jpg|Quest | ||
| Line 209: | Line 215: | ||
Image:RepairGlyph.jpg|Repair | Image:RepairGlyph.jpg|Repair | ||
Image:ResilientGlyph.jpg|Resilient | Image:ResilientGlyph.jpg|Resilient | ||
| − | |||
Image:SafetyGlyph.jpg|Safety | Image:SafetyGlyph.jpg|Safety | ||
Image:ScarredGlyph.jpg|Scarred | Image:ScarredGlyph.jpg|Scarred | ||
| Line 216: | Line 221: | ||
Image:SufferingGlyph.jpg|Suffering | Image:SufferingGlyph.jpg|Suffering | ||
Image:The LitanyGlyph.gif|The Litany | Image:The LitanyGlyph.gif|The Litany | ||
| − | |||
| − | |||
Image:War of RageGlyph.jpg|War of Rage | Image:War of RageGlyph.jpg|War of Rage | ||
Image:WyldingGlyph.jpg|Wylding | Image:WyldingGlyph.jpg|Wylding | ||
Revision as of 15:52, 15 November 2020
Majority Icons are taken from [1], [2]. Some have been developed by players.
There are more for Garou, as well as other splats found here: Icons
Garou
- Garou NationGlyph.gif
Garou Nation
- Werewolf
Auspice
Breed
Directions
Elements
Leaders
Nature
Pack
Ranks
Renown
Seasons
Spirits
- GaiaGlyph.jpg
Gaia
- LunaGlyph.jpg
Luna
- HeliosGlyph.jpg
Helios
Triat
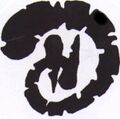
- WeaverGlyph.jpg
Weaver
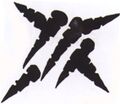
- WyldGlyph.jpg
Wyld
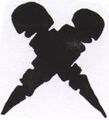
- WyrmGlyph.jpg
Wyrm
Wyrm
- Beast of WarGlyph.jpg
Beast of War
- MonstersGlyph.jpg
Monsters
- VampiresGlyph.jpg
Vampires
Umbra
- PangeaGlyph.jpg
Pangea
Tribe
Lost Tribes
Weather
Misc
- ApocalypseGlyph.jpg
Apocalypse
- CaernGlyph.gif
Caern
- GaiaGlyph.jpg
Gaia
- ImpergiumGlyph.jpg
Impergium
- KlaiveGlyph.jpg
Klaive
- StarGlyph.jpg
Star
- The LitanyGlyph.gif
The Litany
- War of RageGlyph.jpg
War of Rage
